Have you ever been to a celebration where you were amazed by the food? You may have gone to a festive of a different culture and were surprised with all the different and new flavors that you tasted. After all, all cultures have their own celebrations with their own recipes.
In May, we will publish a special edition of BLEND magazine to celebrate the 55th anniversary of BUas. Maybe by the time you visit this article, the magazine is already out, and you scanned the QR code for the delicious food recipes that we have mentioned in the article. Maybe you just love articles about recipes and are here before the BLEND has been published. In that case, remember the week of May 16-22, because that is when BLEND is out, and you can read all about the celebrations at which these recipes are being served. Enjoy these sweet treats!
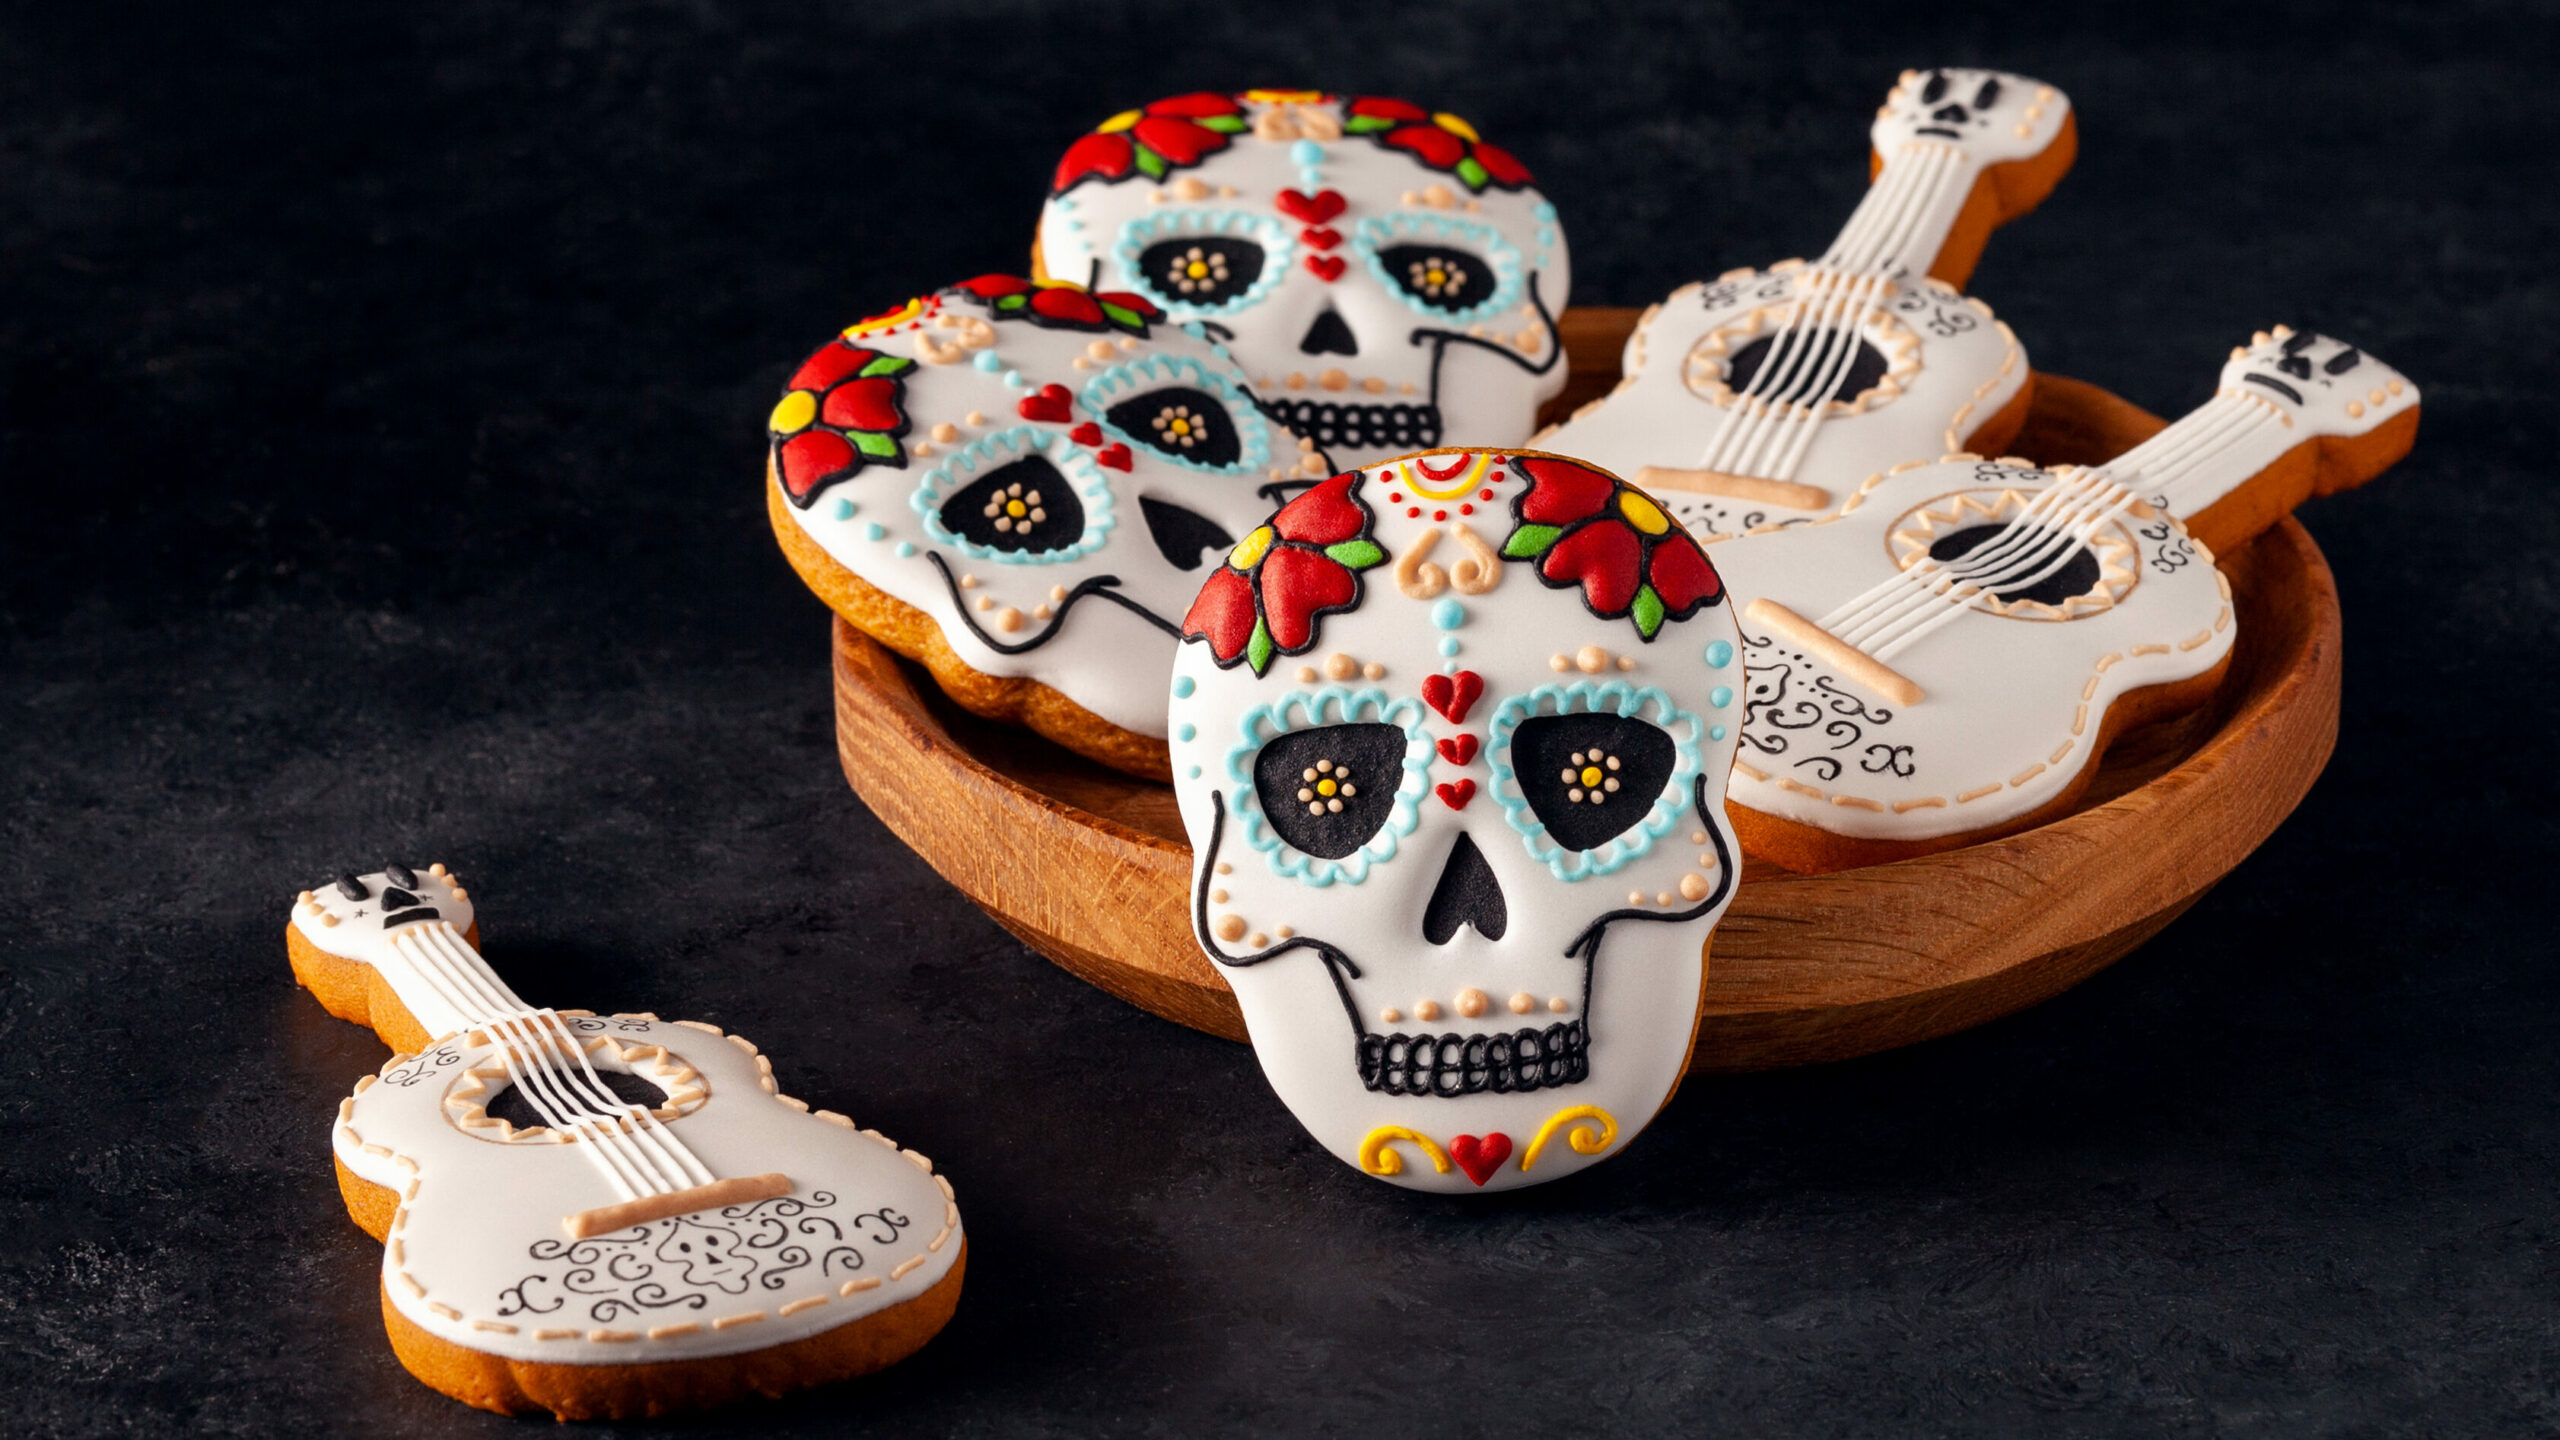
Mexican Buttery Skull-shaped Cookies
Preparation time: 25-minutes (must rest six hours)
Serving: 12 cookies
On Día de Muertos (Day of the Dead), buttery skull-shaped cookies cannot be missed. These colorful cookies do not only look sweet, they are! Therefore, the ingredients might not come as a surprise, but just to be sure, let me walk you through it. The following ingredients are meant for a serving of 12 cookies.
Cookies Ingredients:
- 640 gr all-purpose flour
- 2 teaspoons baking powder
- 1 teaspoon salt
- 192 gr unsalted butter at room temperature
- 256 gr granulated sugar
- 4 medium eggs
Royal Icing Ingredients:
- 2 egg whites at room temperature
- 128 gr powdered sugar
- ½ teaspoon cream of tartar
- Gel food coloring in every color you like
Other supplies:
- Sugar Skull cookie cutters
- Pipping bag
Now that you have gotten all the supplies, you are ready to make these delicious cookies. We firstly start with the basis: The cookies! Can you already smell them?
Cookies directions:
Before six hours rest:
Step 1: Cream the butter and sugar in a mixing bowl until it is smooth.
Step 2: Add all eggs at once and continue mixing.
Step 3: Add vanilla and continue mixing.
Step 4: Sift the baking powder, flour, and salt together and add them to the mixture.
Step 5: Mix all ingredients thoroughly on low speed.
Step 6: Make the dough into a ball and wrap the ball entirely in plastic.
Step 7: Put the dough ball in the refrigerator for 6 hours.
After six hours rest:
Step 8: Preheat the oven to 160 °C.
Step 9: Pull the dough out of your refrigerator. Let it rest until it is soft enough to work with it.
Step 10: Sprinkle flour on your work surface, rolling pin, and on the batter if necessary.
Step 11: Roll the dough onto the cutting board to a thickness of +/- 1.3 cm and use the Sugar Skull cookie cutter to cut the cookies.
Step 12: Line the oven tray with parchment paper and place the skull cookies on the sheet.
Step 13: Bake the cookies at 160 °C degrees for 8 minutes.
Step 14: Take the cookies off the sheet, place them on a wire rack, and let them cool down completely.
The cookies are already delicious on their own, but with the icing, you can finish them off and make them look delicious as well.
Icing Directions:
Combine the eggs, powdered sugar, and cream of tartar into a mixing bowl and mix on medium speed for about 4 minutes. If icing is not peaking, add another 32 gram powdered sugar.
You have arrived at the fun part; it's decorating time! Are you ready for this? Do you already have a design in mind? If not, think about this first. Tip: look up sugar skull cookie designs or Day of the Dead skull designs and print them out. Let your creativity flow!
Decorating the cookies:
Step 1: Divide the icing into several bowls.
Step 2: Add 2-3 drops (or whenever you are satisfied with the color) of each gel food coloring to each bowl of icing and mix this well.
Step 3: Spoon each color of icing into different bags and twist the open end of the bag to push the icing to the tip.
Step 4: Outline the skulls in white. You will later fill them in.
Step 5: Outline the designs with your colored frostings, then fill the closed designs in with that same color. Let the facial designs dry after this.
Step 6: Add 1 teaspoon of water to your white icing. Slowly fill in the rest of the face-up to the outline and let the frosting set.
If you want an example of how to decorate, watch this video.When the frosting is set, you are all done. Enjoy your cookies with your friends, family, or maybe you find these cookies so delicious that you want them all for yourself 😉 I would completely understand!
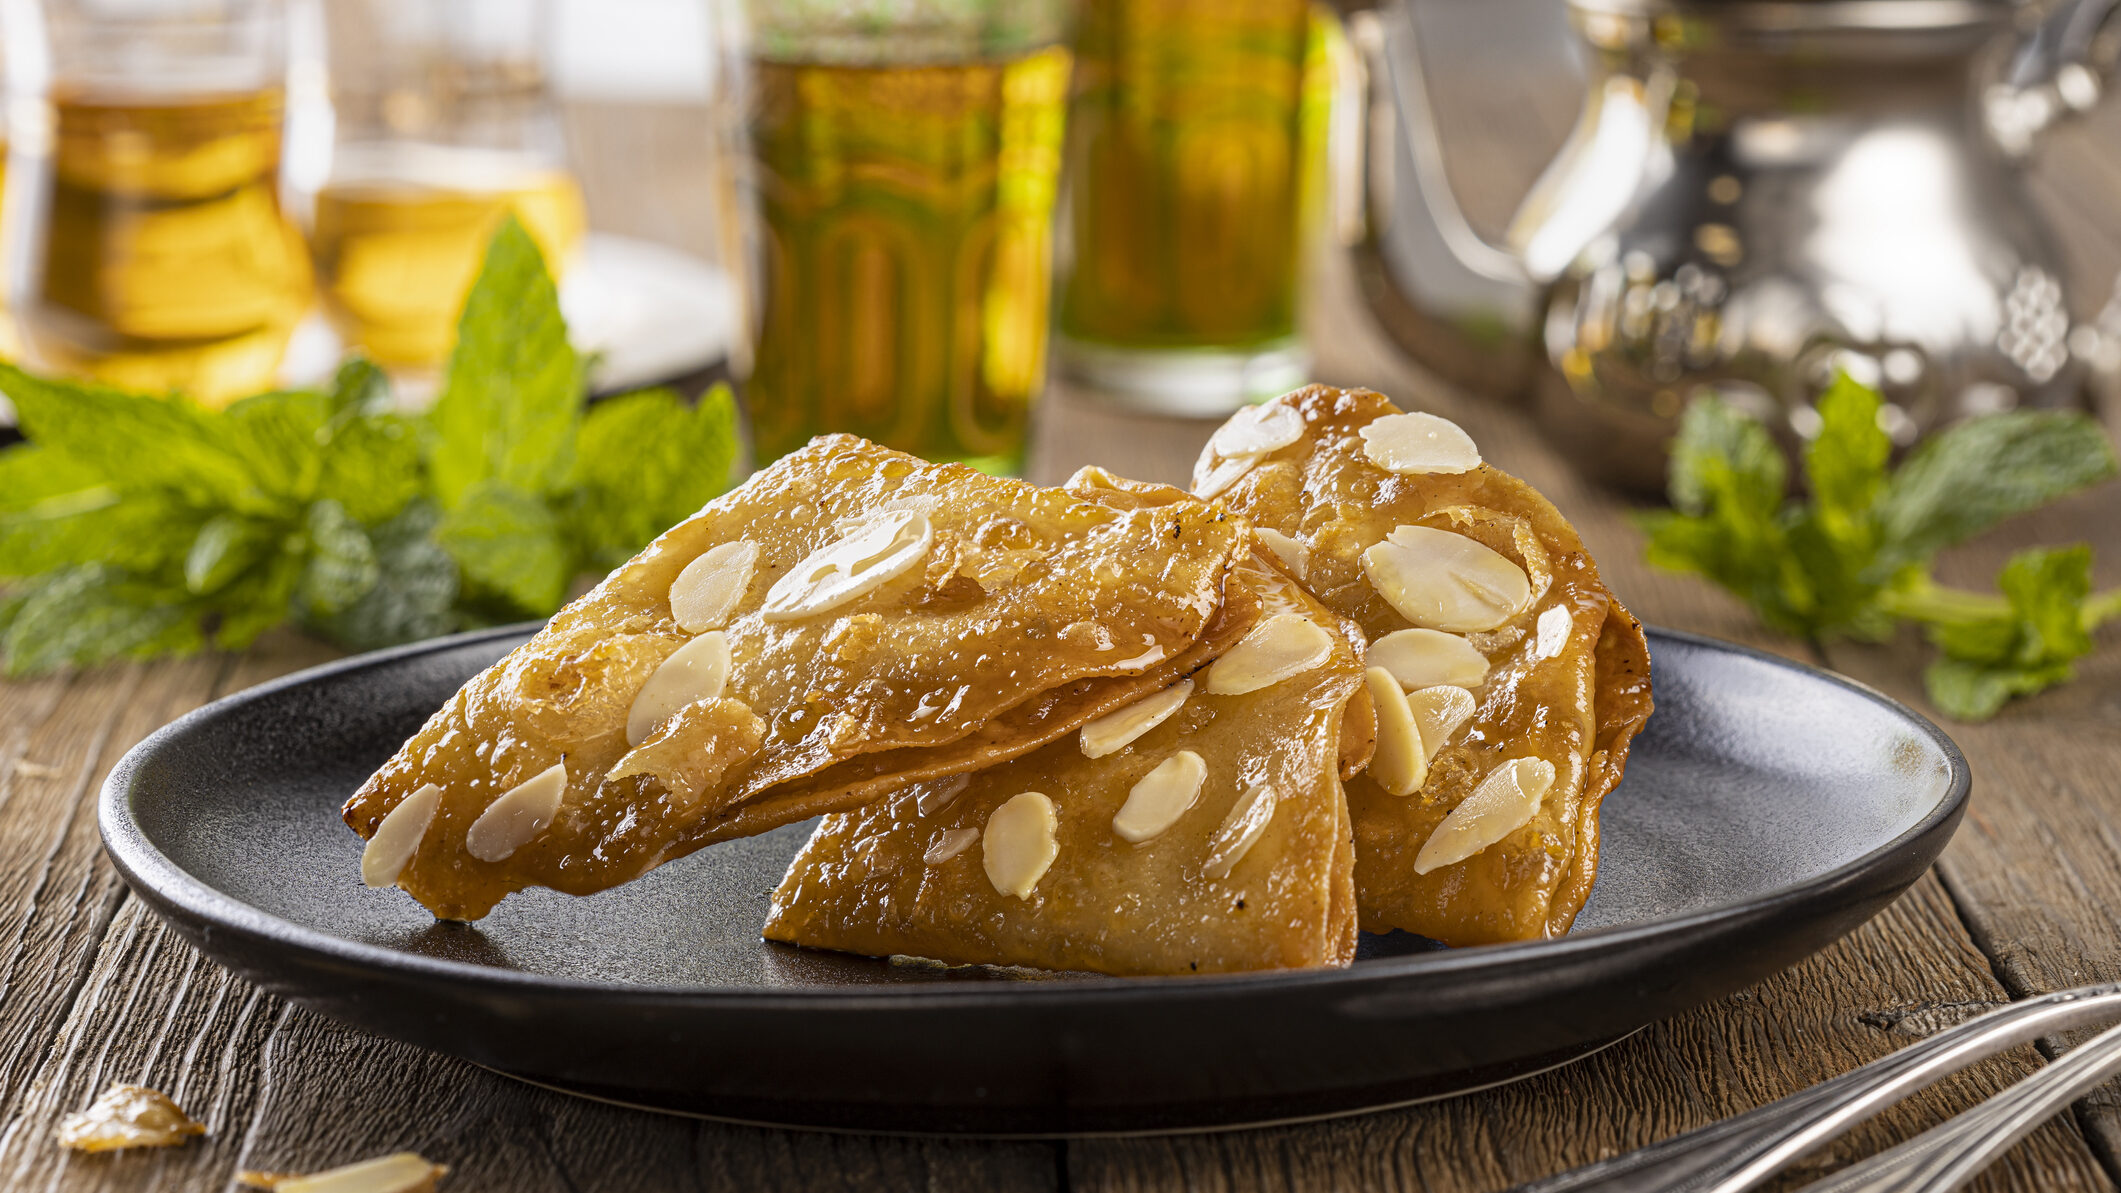
Moroccan Briwat with Almonds
Preparation Time: > 1 hour
Serving: 140 pieces
Briwat is a dish of Moroccan cuisine. It is mainly known as a puff pastry filled with meat combined with cheese, lemon, and pepper. This Briwat recipe is a little different. Instead of a savory dish, the Moroccan Briwat with Almonds is sweet. This dish cannot be missed during Ramadan! Firstly, the ingredients.
Ingredients:
- 1 kg almonds
- 200 gr powdered sugar
- 128 gr of melted butter
- 3 tbsp orange flower water
- 1 tsp cinnamon
- 2 packs of filo pastry
- 250 gr melted butter
- 2 to 3 jars of honey
- 1500 ml sunflower oil
Extra:
- Toasted almond shaving.
Since almonds are the main ingredient, we begin by preparing them. Let’s begin!
Almonds Directions
Step 1: Put the almonds in a small pan with water and bring to a boil.
Step 2: Let it simmer for 10 minutes and then drain it.
Step 3: Remove the skin from the almonds and dry the almonds in a tea towel.
Step 4: Finely grind the almonds with the sugar in a food processor.
Step 5: Add the butter, orange blossom water, and cinnamon and mix to form a cohesive almond paste.
Step 6: Make small balls of this mixture 'the size of an olive' and set them aside.
You're almost there, but the filling is nothing without the crispy layer around it.
Pastry Directions
Step 1: Defrost the filo pastry and cut it into equal strips (about 5 cm wide).
Step 2: Brush a piece of dough with melted butter.
Step 3: Place a ball of almonds on a strip and fold the strip into a triangular shape.
Step 4: Heat the oil in a deep-frying pan over a medium heat.
Step 5: Fry the Briwat on both sides, stirring constantly until golden brown (around 6-8 minutes).
Step 6: Immediately dip them in honey and drain them in a colander.
Extra Step: Sprinkle the Briwat with some toasted almond shavings.
Hopefully, the Briwat has been successful, and you can enjoy these sweet pastries with everyone you love.
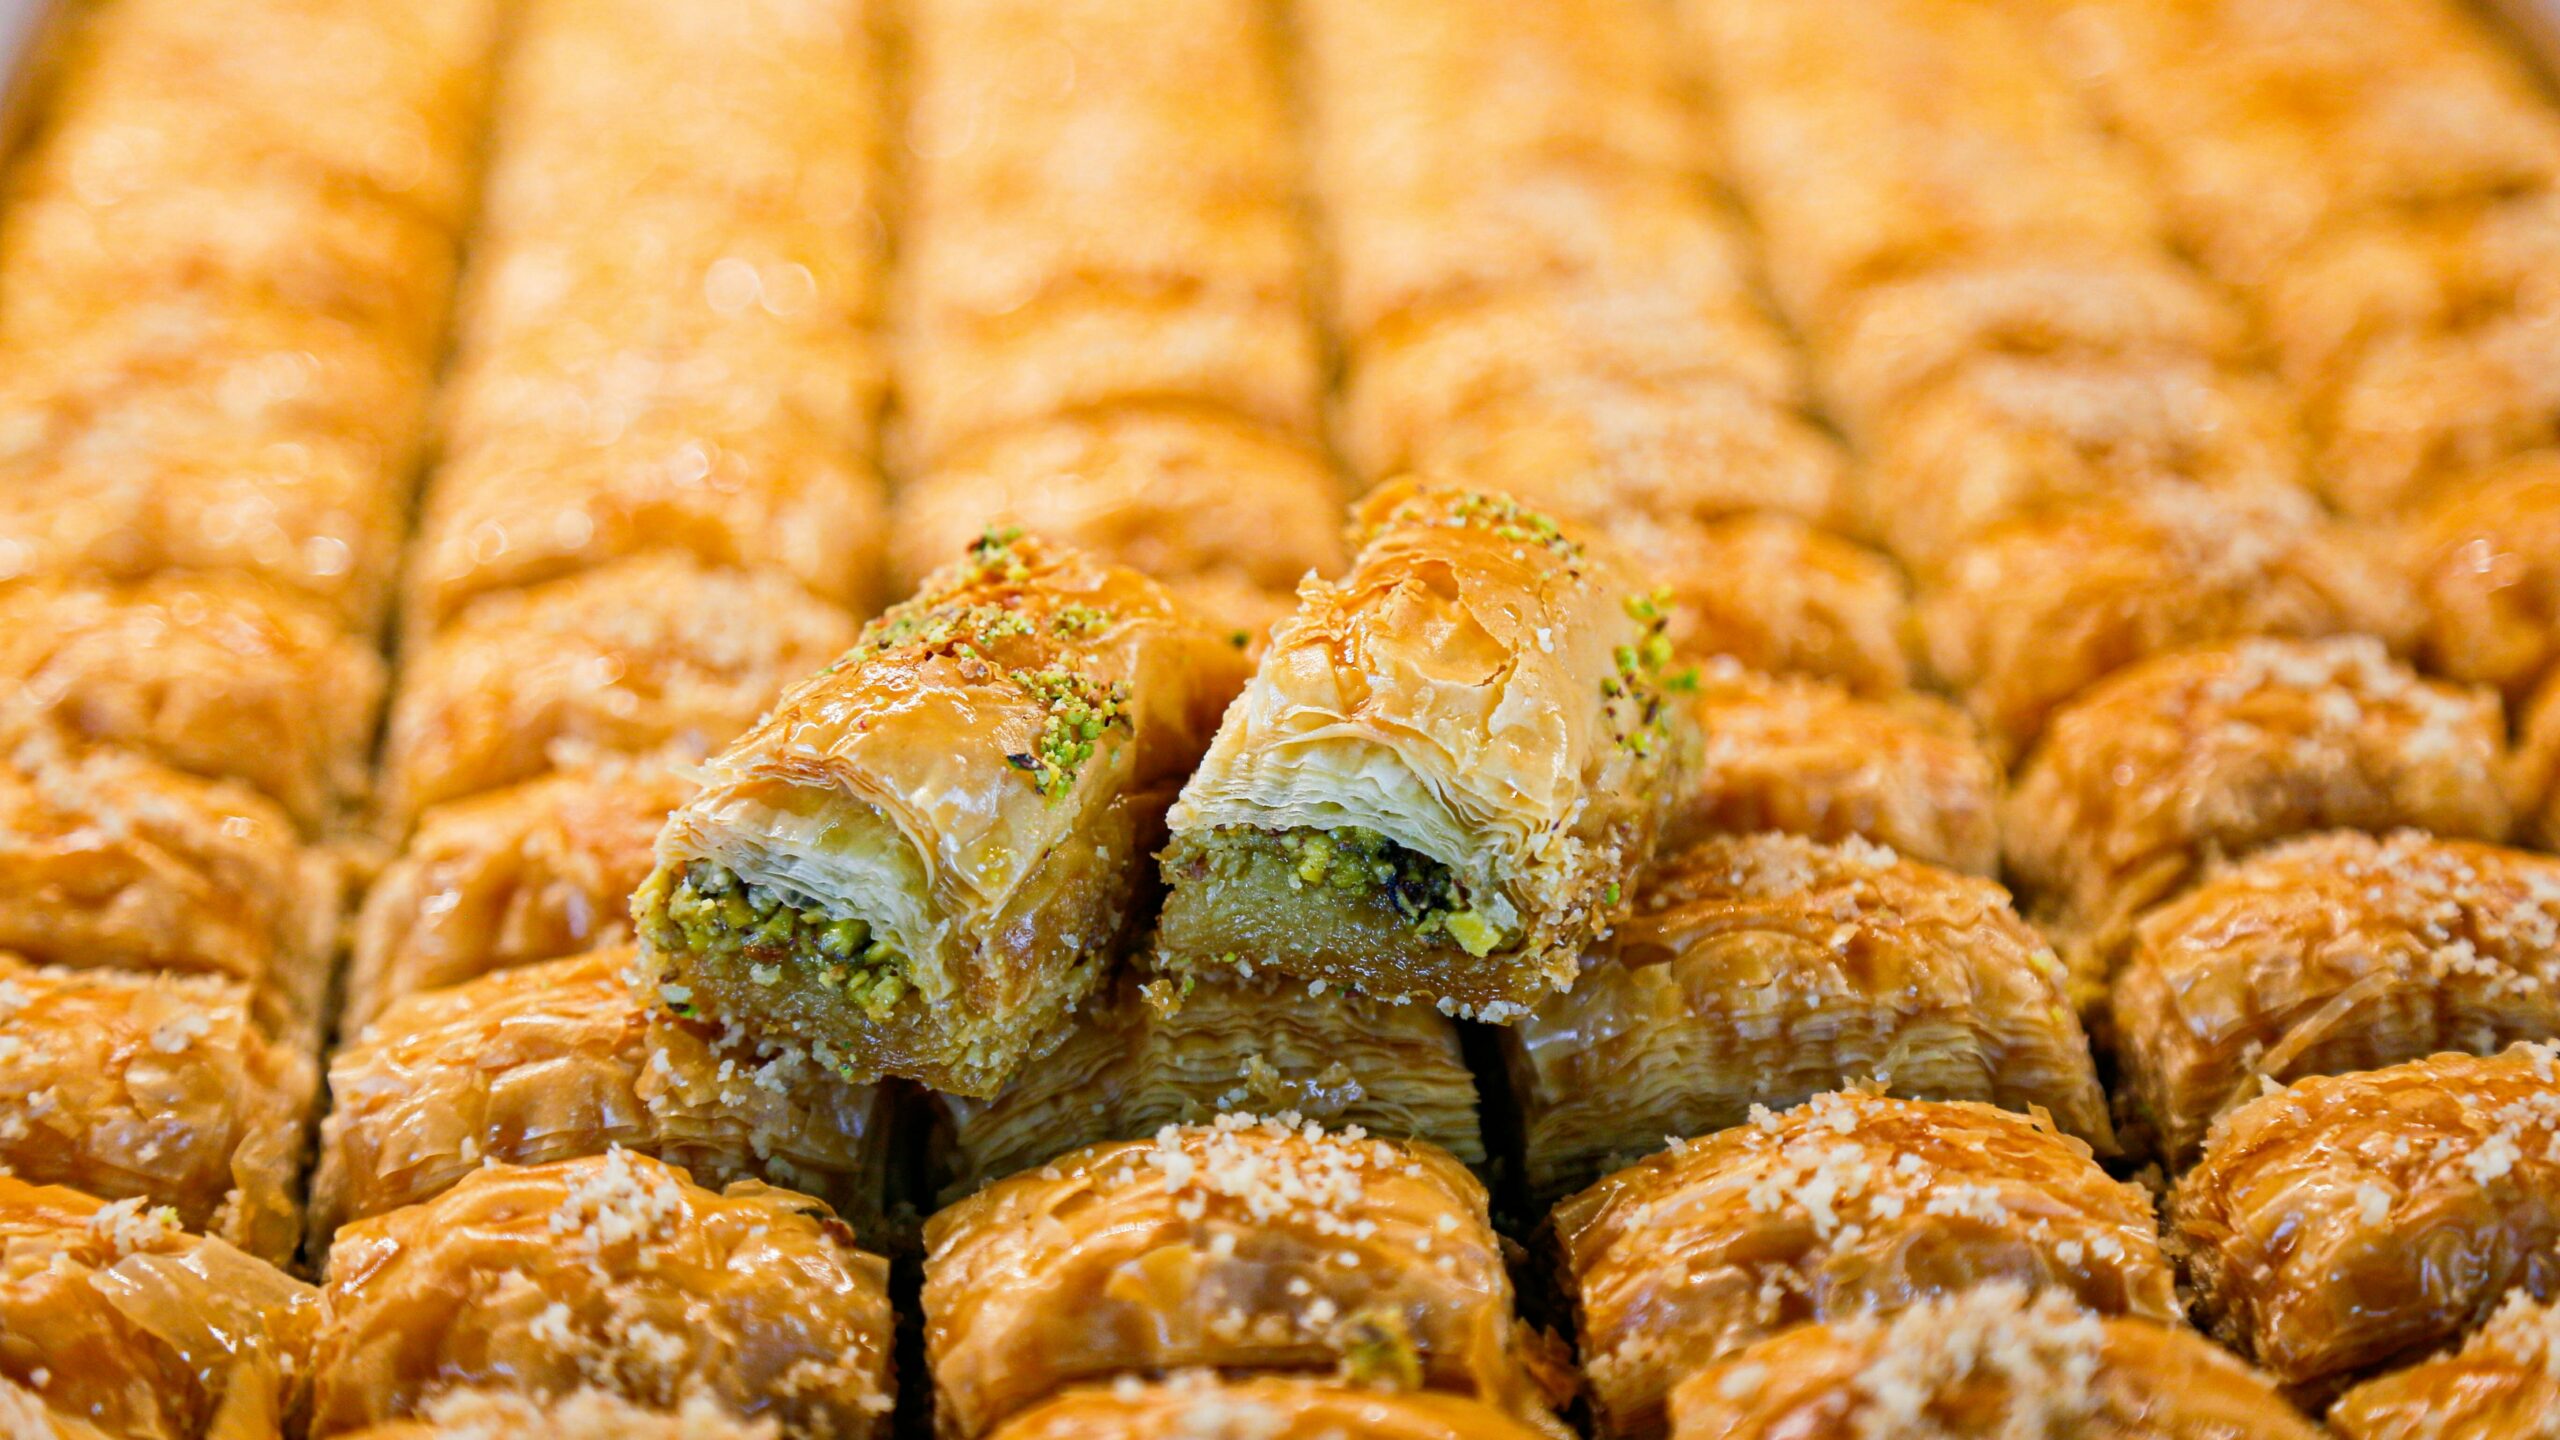
Turkish Baklava
Preparation Time: +30 minutes (+40 minutes in the oven)
Serving: 32 pieces
One of the most famous pastries in Turkish cuisine is Baklava. You might have already tasted Baklava in a restaurant or at a celebration and wondered what the recipe of this delicious pastry is. The filling of the Baklava can vary, but for this one we will use pistachio and walnuts. You can serve the pastry with a scoop of vanilla ice cream if you like.
Dough Ingredients:
- 16 sheets of filo pastry (the size of the baking pan)
- 175 g melted butter
Filling Ingredients:
- 100 gr pistachio nuts, finely chopped
- 200 gr walnuts, finely chopped
- 1 ½ tsp cinnamon powder
- 50 gr sugar
Sugar Syrup Ingredients:
- 300 gr sugar
- 100 gr honey
- 200 ml water
- 3 strips of lemon peel
- Juice of ½ lemon
- 2 tbsp orange blossom water (optional)
Other Ingredients:
- 20 g pistachio nuts, finely chopped
If you have mastered the recipe of Baklava, you will make yourself very popular. Even more important, you can eat as much Baklava as you want! But first, let's try and make this pastry!
Layer Directions:
Step 1: Preheat the oven to 180 degrees and grease a baking pan or roasting pan measuring about 25 by 35 centimeters with the melted butter.
Step 2: Place 2 layers of filo pastry in the mold and brush with the melted butter.
Step 3: Place another 2 sheets on top, brush with butter and repeat until there are 8
layers in the mold.
Filling Directions:
Step 1: Mix the chopped nuts with the cinnamon and sugar.
Step 2: Spread the mixture over the filo dough and press down well.
Step 3: Cover the filling with the remaining sheets of dough, brushing the dough with the melted butter between every 2 layers.
Step 4: Using a sharp knife, cut the dough into 32 pieces; quarter lengthwise and eight strips widthwise.
Step 5: Spread the remaining melted butter over the dough with a spoon.
Step 6: Bake the Baklava for 35 to 45 minutes until golden brown and cooked.
While waiting for the Baklava, you can prepare the sugar syrup. It might seem like a lot of sugar syrup when you are finished, but the Baklava will absorb it. It will be delicious!
Sugar Syrup Directions:
Step 1: Place the sugar, honey, water, and lemon peel strips in a saucepan and bring to the boil.
Step 2: Let it boil gently on low heat for 10-14 minutes until it becomes a syrupy sugar syrup.
Step 3: Remove the pan from the heat and add the lemon juice and, if desired, the orange blossom water.
Step 4: Stir well and allow to cool.
Finishing Touches:
Step 1: As soon as the Baklava comes out of the oven, spread the sugar syrup over the hot Baklava.
Step 2: Let the baklava cool completely before serving.
Step 3: Before serving, sprinkle the Baklava with finely chopped pistachios.
You are finally done. Enjoy your homemade Baklava, and for a moment, act as if you are in Turkey!

